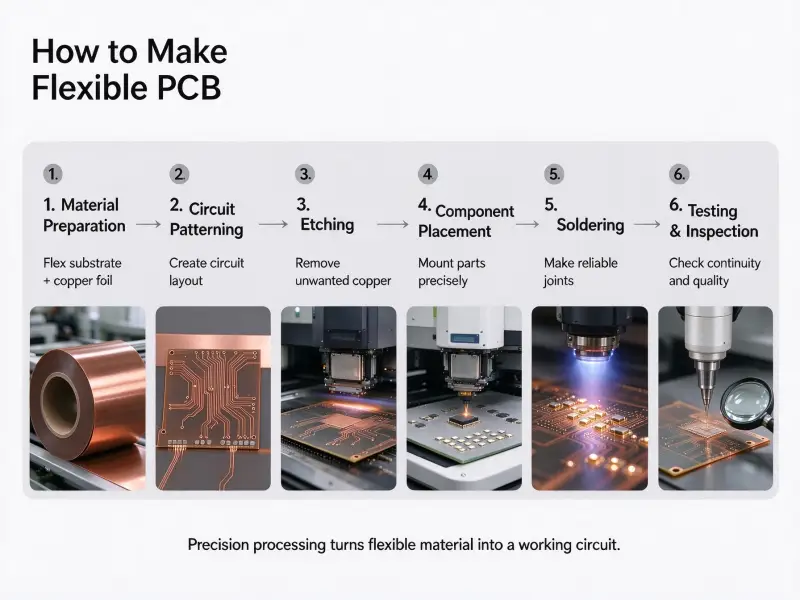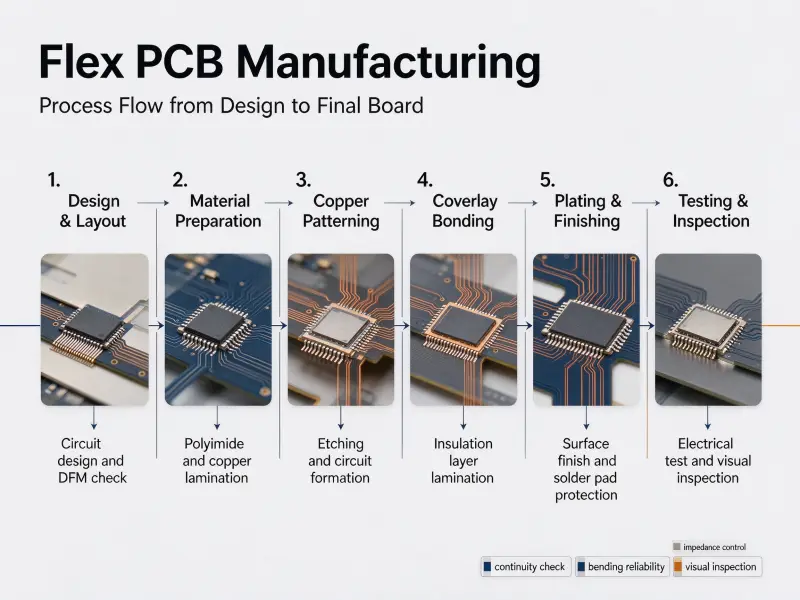
Rigid-flex boards solve a problem rigid boards can’t: they let one circuit stack fold into a product while keeping the electrical performance of a solid multilayer board. That advantage only shows up if the layout respects both the electrical and the mechanical side of the design. Most first-pass rigid-flex boards fail at the bend area or the rigid-to-flex transition, not in the schematic.
This guide covers the design decisions that reach manufacturing: rigid-flex PCB stackup planning, material selection for flex and rigid zones, minimum bend radius, the 3W, 3H, and 20H rules, transition zone protection, and the cost drivers you can control before Gerber release. The rules below follow IPC-2223, the sectional design standard for flexible and rigid-flexible printed boards, along with IPC-6013 for qualification and performance.
Everything here maps to the questions a fabricator will ask when you submit a design.

What makes rigid-flex design different from rigid boards
The same board must satisfy two sets of constraints at once. Rigid sections follow familiar multilayer rules, while flex sections add bend radius, dynamic versus static use, and material fatigue. The transition zone between them is governed by neither standard alone, which is why it becomes the main source of manufacturing defects.
A rigid board has one design mode: keep signals clean and the stackup manufacturable. A rigid-flex board adds a mechanical envelope. The flex section gets bent during assembly, during installation, or continuously during operation. IPC-2223 splits these into static applications, where the board bends only to install and typically fewer than 100 times over its life, and dynamic applications, where the flex zone moves repeatedly.
That distinction drives almost every downstream decision: the bend radius multiplier, whether adhesive-based material is acceptable, and whether rolled annealed copper is mandatory. Treat both cases the same, and the design is either over-specified and expensive or under-specified and unreliable.
Where rigid-flex fails in the field
Failures cluster in two places. In the bend area, copper traces crack when the bend radius is tighter than the material tolerates or when traces run parallel to the bend line instead of perpendicular to it. Repeated cycling accelerates the damage until the trace opens.
At the transition, the failure mode is delamination and peeling. Flex material and rigid laminate have different stiffness, so mechanical stress concentrates at the boundary. If the coverlay stops short of the rigid section, or vias sit too close to the boundary, that line becomes the weak point. Both failures are fixed on the drawing, not on the line.
Rigid-flex PCB stackup planning
Plan the stackup first, because layer count and layer order constrain everything else. Rigid-flex stackups work best with an even number of layers, identical layer counts across all rigid sections, and flexible layers positioned near the center of the structure. An odd, asymmetrical stackup invites warpage during sequential lamination.
Start with one question: how many conductors does the flex zone actually need? A flex section carrying power and a few control signals rarely needs more than two layers, while one routing dense high-speed differential pairs may need four. Every extra flex layer adds lamination cycles, cost, and stiffness, and stiffness fights the flexibility you chose rigid-flex for. Rigid sections should then mirror each other.
If one has six layers and another has four, lamination has to manage different heights and material flow, which lowers yield. Flex layers themselves belong near the middle of the stackup, close to the neutral bend axis, where critical traces see almost no tensile stress. The bookbinder design achieves this for multilayer boards by leaving flex layers unbonded in the bend region so they shift relative to each other and reach tighter radii.
Common rigid-flex stackup configurations
| Configuration | Structure | Typical use | Relative cost |
| 2-layer rigid-flex | 2 rigid + 1 flex zone, single flex layer | Fold-to-install interconnect | Low |
| 3-layer rigid-flex | Rigid sections with one double-sided flex zone | Compact devices, connector bridging | Low to medium |
| 4-layer rigid-flex | 4 rigid + 2 flex layers | Most common production rigid-flex | Medium |
| 6-layer rigid-flex | 6 rigid + 2 to 4 flex layers | Medical, industrial, instrumentation | High |
| Multilayer HDI rigid-flex | 8+ rigid layers with microvias and blind vias | Dense BGA, high-speed compact systems | Very high |
Moving a design from eight layers to six often saves more than any later price negotiation, because it removes a lamination cycle and reduces registration risk.
Single-sided, double-sided, and multilayer flex sections
IPC-2223 classifies flexible constructions, and the type you pick sets how much design margin you need.
- Type 1: single conductive layer, with or without adhesive. Used for basic interconnects and membrane switches.
- Type 2: two conductive layers without plated through holes. Surface-mount only, cost-sensitive designs.
- Type 3: two conductive layers with plated through holes. The general-purpose flex construction.
- Type 4: three or more conductive layers. Multilayer flex for complex routing or HDI.
A rigid-flex board typically combines one of these flex types with multilayer rigid sections. The higher the type, the more the bend radius, coverlay, and stiffener requirements tighten.
Rigid-flex PCB material selection
Material selection splits along the same line as the design: polyimide and rolled annealed copper in the flex zone and FR-4 in the rigid zone. The choice that moves cost and reliability most is whether the flex construction is adhesiveless or adhesive-based. Use adhesiveless where the board flexes repeatedly and adhesive-based where it bends only to install.
Polyimide is the standard flex dielectric because it holds its mechanical properties across a wide temperature range and survives repeated bending. FR-4 remains the standard rigid core. Rolled annealed copper has a grain structure aligned with the bend direction and handles dynamic flexing far better than electrodeposited copper, which is cheaper and suits rigid sections where fine trace definition matters more than fatigue life.
The adhesive layer is where designers most often overspend. An adhesiveless construction casts polyimide directly onto copper foil, cutting Z-axis expansion, improving dimensional stability, and removing the layer most likely to absorb moisture or separate under heat. It also costs significantly more, while an adhesive-based construction using acrylic or epoxy between layers is cheaper and adequate for static applications. IPC-2223 permits a mixed approach, so a design that uses adhesiveless construction only in the dynamic zone and adhesive-based construction elsewhere is both compliant and cheaper.
Copper type and coverlay thickness
Coverlay, the protective polyimide film bonded over flex conductors, has a minimum thickness tied to copper weight:
| Copper weight | Minimum coverlay thickness |
| 0.5 oz or less | 1 mil |
| 1 oz | 1.5 mil |
| 2 oz | 3 mil |
Coverlay thickness should stay uniform across the flex zone. Uneven coverlay changes local stiffness, which shifts where the bend concentrates and defeats the radius you calculated.

Bend radius and flex zone design
Bend radius is the most important number in a flex design. Calculate it from total flex thickness multiplied by a factor that depends on layer count and on whether the application is static or dynamic. Dynamic applications need radii an order of magnitude larger than static ones.
Measure from the inside surface of the bend, not the centerline or outside. Then add 20% to 30% as a safety margin, because real assemblies rarely bend where the drawing says they will. Layer count matters because a single flex layer tolerates a much tighter bend than a multilayer stack, where outer layers travel a longer path around the bend.
Minimum bend radius by layer count
| Layer count | Static application (r : T) | Dynamic application (r : T) |
| Single layer | 6:1 | 100:1 |
| Double layer | 12:1 | 150:1 |
| Multilayer | 24:1 | 200:1 |
Where r is the minimum bend radius and T is the total thickness of the flexible portion. For a double-layer flex zone 0.15 mm thick, the static minimum works out to 1.8 mm, while the same construction used dynamically needs 22.5 mm. That gap is why application type has to be settled before layout begins.
Design rules inside the bend area
- Route traces perpendicular to the bend line, never parallel to it.
- Stagger conductors on multilayer flex so copper does not sit directly above copper.
- Use rounded corners instead of sharp angles, and taper traces as they enter pads.
- Keep conductor width in the neutral-axis layer under about 10 mil where the design allows.
- Avoid via-in-pad in the flex zone, and keep plated through holes at least 20 mil from the bend boundary.
- Keep holes at least 0.9 mm from the flex area, and give the flex zone itself at least 2.0 mm of length.
- Replace solid copper fills with hatched planes, which cut stiffness substantially while still providing an impedance reference.
Trace routing and crosstalk control rules
Crosstalk rules apply in rigid-flex the same way they apply in rigid boards, but the flex zone adds spacing pressure because you’re routing a limited layer count through a narrow span. The three rules that come up most are 3W for trace spacing, 3H for signal-layer pullback, and 20H for power-plane pullback. Each addresses a different coupling problem.
All three use a reference dimension. In the 3W rule, W is trace width. In the 3H and 20H rules, H is the dielectric thickness between the relevant layers.
The 3W rule targets crosstalk between adjacent traces on the same layer. At a center-to-center spacing of three times the trace width, most of the electric field from one trace no longer couples into its neighbor. The 3H and 20H rules target edge radiation instead. The 3H rule keeps signal traces back from the board edge by three times the signal-to-reference dielectric thickness, so the reference plane still shields them. The 20H rule does the same for power planes, recessing the power plane relative to the ground plane so the field stays inside the board edge.
The 3W, 3H, and 20H rules explained
| Rule | Definition | Primary purpose | Applies to |
| 3W | Trace center-to-center spacing at least 3x trace width | Reduce same-layer crosstalk | Signal traces |
| 3H | Signal traces pulled back 3x dielectric thickness from board edge | Reduce edge radiation | Signal layers |
| 20H | Power plane recessed 20x dielectric thickness from ground plane edge | Confine field, reduce EMI | Power and ground planes |
In a flex zone the priority is different. Mechanical reliability outranks spacing optimization, so traces get wider and spacing gets larger than the electrical minimum wherever the layer budget permits.
The rigid-to-flex transition zone
The transition zone is where the board changes stiffness, and it’s where most rigid-flex failures originate. Three rules control it: the coverlay must extend into the rigid section, traces must cross the boundary perpendicular to it, and vias must stay clear of the boundary on both sides.
When rigid laminate and flex material meet, the stiffness change concentrates stress at that line. A coverlay that terminates exactly at the boundary leaves the flex substrate exposed to peeling forces, so extend it at least 1 mm into the rigid section. A trace crossing at an angle sees tension and shear during bending, and the corner where it meets the boundary becomes a crack initiation point, so run traces perpendicular to keep the load axial. A via near the boundary stiffens the local area and pulls the bend into a tighter radius than intended, so keep vias at least 0.5 mm clear on both sides.
Stiffener design at the transition
Stiffeners support components mounted near a flex zone and define the mechanical boundary of the flex region. Common materials are polyimide, FR-4, stainless steel, and copper. Thinner stiffeners, under 10 mil, are typically polyimide, while thicker or more rigid requirements call for FR-4 or metal. The stiffener should also overlap the bare coverlay by roughly 30 mil at the flex boundary, so the change in stiffness is gradual rather than abrupt.
Rigid-flex PCB cost drivers and how to control them
A rigid-flex board costs more than a comparable rigid board because it combines two production routes: rigid lamination and flex processing. Cost is driven by layer count, material system, lamination cycles, panel utilization, and yield. Most of it is fixed at design time.
The cost structure surprises first-time buyers because the same outline area can produce very different quotes. A 2-layer flex with two stiffener zones is a different product from an 8-layer rigid-flex with buried vias, controlled impedance, and two lamination cycles. Volume changes the picture too: prototype orders carry the full engineering and setup cost on a handful of units, while panelization and process qualification amortize that cost across production volume.
Layer count and lamination cycles
Each sequential lamination cycle adds press time, handling, and yield risk. A typical multilayer rigid-flex needs several cycles compared to one for a standard multilayer rigid board. Reducing the number of rigid sections by even one can remove an entire cycle. Consolidating flex layers has a similar effect: a design routing power and a few signals on four flex layers can often drop to two by widening traces and accepting a slightly thicker flex zone.
Material choices that raise or lower cost
- Adhesiveless everywhere. Premium material on static zones that never flex repeatedly. Restrict it to the dynamic zone.
- Rolled annealed copper everywhere. RA copper belongs in dynamic bends; electrodeposited copper is fine in static and rigid areas.
- Tight bend radius. A radius below roughly 6:1 forces adhesiveless material and RA copper. If the enclosure allows even a millimeter more clearance, the cheaper construction becomes viable.
- Over-specified tolerances and custom outlines. Non-standard dimensions need new tooling. Reusing standard hole sizes and outline dimensions cuts non-recurring costs.
The system-level view matters too. A rigid-flex board that replaces several rigid boards, flex cables, and connector pairs removes connector cost, assembly labor, and a set of interconnect failure points. Run that comparison against the complete assembly rather than the board alone.
Standards and documentation for rigid-flex manufacturing
Two standards govern rigid-flex design and acceptance. IPC-2223 defines the design requirements for flexible and rigid-flexible printed boards and their transition zones, while IPC-6013 defines qualification and performance requirements. Both need to be referenced on the fabrication drawing.
IPC-2223 works alongside IPC-2221, the generic printed board design standard, and IPC-2222 for the rigid portions. For a rigid-flex board, all three design standards apply. IPC-6013 then covers what the finished board must pass, including constructions with stiffeners, plated through holes, microvias, and blind or buried vias.
A useful completeness check: could a fabricator build the board without contacting you? If the drawing leaves flex thickness, bend radius, or material system open to interpretation, it will come back as a question, or worse, as a board that doesn’t match your intent.
What to put in your fabrication drawing
- Stack up with layer sequence and identified flex and rigid zones
- Dimensional drawing with tolerances, including flex zone length and boundary positions
- Flex and rigid base materials with thickness and copper weight
- Copper type by zone: rolled, annealed, or electrodeposited
- Coverlay and stiffener specifications with material and thickness
- Minimum bend radius and the static or dynamic use case
- Drill chart with via types and any depth-controlled holes
- Surface finish, plating, marking, and test requirements
Drawing notes should also state the applicable IPC class and the layer-to-layer registration tolerance.
Choosing a rigid-flex PCB manufacturer
Verify that a candidate supplier actually processes flex material, runs sequential lamination, and can validate bend behavior. A standard rigid board shop that advertises flex capability often means thin FR-4 cores, not true polyimide flex construction, and that gap shows up at the transition zone.
The capability checklist is short but specific. Ask whether the supplier holds polyimide at flex thicknesses, whether it can run adhesiveless construction, and how many flex layers it can laminate in one structure. Ask how it reviews the rigid-to-flex transition, since that’s where the supplier’s process knowledge either helps you or leaves you to solve it alone. And ask whether it performs bend verification or flex continuity testing, because a supplier that doesn’t test the flex zone won’t catch the failures described above.
Take a look at what a certified PCB PCBA manufacturer publishes about its process controls before you send a design, and confirm that the same house can handle assembly. Making the board and assembling it under one roof keeps responsibility for interconnect defects with a single party. For rigid-flex specifically, the capability page of a rigid-flex PCB manufacturer supplier is the fastest way to check supported layer counts, minimum core thickness, via types, and material systems against your stackup before quoting.
Bring the same information to every quote: Gerber files with stackup and flex zone definitions, board quantity, surface finish, copper weight, stiffener specification, and the bend radius with its use case.

FAQ
How do I decide between a flex PCB and a rigid-flex PCB?
Choose a flex PCB when the whole circuit bends and there’s no need for component support beyond the flex substrate. Choose rigid-flex when one part of the circuit must stay rigid to carry components and another part must bend to fit the enclosure. Rigid-flex usually replaces a set of rigid boards joined by cables and connectors, which is where its reliability advantage comes from.
Can I place components in the flex zone?
In general, no. Surface-mount components belong on the rigid sections, where the substrate won’t flex under solder joints. If a part genuinely has to sit in or near a flex zone, it needs a stiffener behind it to create a local rigid island. Without that backup, thermal and mechanical stress from the component works directly on flexing material.
How much does the flex layer count affect minimum bend radius?
It affects it substantially. A single flex layer tolerates a bend radius of about six times its thickness in static use, while a multilayer flex stack needs roughly twenty-four times its thickness for the same application. Each added flex layer moves outer conductors further from the neutral axis and increases how far they travel around the bend, so radius requirements grow with layer count.